What Can You Do With a Hermes Agent VPS?

In this article, we walk through what one can do with a Hermes agent; from simple yet repetitive personal assistant tasks to complex research and development tasks. Also we explain why running Hermes agent on a VPS is far better than running it on a local machine/laptop.

We’ve had Hermes Agent running on one of our own dedicated VPS servers in Amsterdam for a few weeks now, mostly as an internal experiment that turned into an actual product. So instead of another “here’s what AI agents can theoretically do” post, this one is closer to a field report – real commands, real setup steps, and the things that actually turned out to be useful once we stopped tinkering and started using it.

Quick background for anyone who hasn’t run into it yet: Hermes Agent is Nous Research’s open-source, self-hosted agent. Not a model – an actual agent application, with its own CLI, memory, and a “skills” system, that you point at whichever model you want underneath (their own Hermes models, Claude, GPT, whatever you’ve got API access to). That distinction trips people up constantly, so it’s worth getting straight before anything else.

Getting Hermes Agent running

The install is a single line:

root@localhost:~$ curl -fsSL https://hermes-agent.nousresearch.com/install.sh | bash

That pulls down Python, Node, ripgrep, ffmpeg, and everything else it needs, and drops the whole thing into ~/.hermes/hermes-agent.

Once it’s done, reload your shell and run hermes –tui to open the terminal interface. First thing it asks is which model to use – we pointed ours at a hosted Hermes model through Nous Portal for the general agent work, though you can just as easily wire in Claude or ChatGPT if that’s what you’re already paying for.

If you’d rather keep it boxed off from the rest of the server, there’s a Docker path too:

root@localhost:~$ mkdir -p ~/.hermes

and then run:

root@localhost:~$ docker run -it --rm -v ~/.hermes:/opt/data nousresearch/hermes-agent setup

That -v ~/.hermes:/opt/data bit matters as it’s the only place Hermes keeps its state (config, memory, skills, logs), so mapping it to a folder on the host means a container restart doesn’t wipe anything.

What we actually use Hermes Agent for

Log screening – You can point Hermes agent at a log file and ask it directly: “summarize the last 200 lines of /var/log/nginx/error.log” . It will read the contents of the file and give you a summary of what happened, not a wall of raw lines.

Skills instead of one-off scripts – Skills are just instruction files that teach the agent how to do a specific job: deploy something, generate a report, run a specific check. You can browse what’s already out there, search by keyword, and install a skill straight from the hub, for example: hermes skills search kubernetes

Talking to it from somewhere other than a terminal. Hermes gateway setup walks you through connecting Telegram, Slack, Discord, or a handful of others. This is useful if you want people to be able to use without having to ssh on a server!

It remembers things. You can show Hermes agent how to fix something once and it holds onto that. For example, you can ask it to restart mysql service after as specific failure. You can ask it again weeks later, and it already knows the context, instead of starting from scratch like a normal chatbot would.

Hermes Agent Use Cases

Here are some use cases of Hermes Agent shared by people, showing the different ways it’s changed how they work.

Personal Assistant
“every weekday at 9am, summarize my inbox and post to Slack,” and it creates the schedule. No config files. No cron syntax.” Read more >

Content Creation
“I use Hermes to generate tweet threads from my past YouTube scripts, then start a brand new session and watch it recall everything without me re-uploading a single file.” Read more >

Security
“I’ve put together a skill to protect against some of the common LLM / AI threats and some of my recommended security policies that are being used to good effect on other AI agent tools.” Read more >

Why run Hermes Agent on a VPS instead of a laptop

A dedicated VPS keeps the agent, its memory, and its skills available whenever you need them, reachable over Telegram or SSH from anywhere, without occupying your own machine or losing state every time you close a session.

It’s also just easier to give a whole team access to one shared agent running on shared infrastructure than to have everyone running their own local copy with no shared memory between them.

Get Hermes Agent on a VPS in just One Click

NetShop’s newly launched Hermes Agent VPS product brings the popular AI agent to you in just one click. No need to have linux or server adminstration experience. Just pick a plan through the Hermes Agent VPS page and it’s ready to go, pre-configured and reachable from wherever you work.

Introducing Hermes Agent VPS: Your Own AI Agent, Live in One Click

NetShop ISP announce the availability of Hermes AI Agent on its VPS product range. Available for deployment in multiple regions around the worldwide.

We have been working on this for quite some time, mainly for internal use only. Today, we are rolling it out to everyone: Hermes Agent VPS, a self-hosted AI agent server that you can now deploy with a single click!

We didn’t want Hermes to be something you had to fight to set up. Self-hosting an AI agent usually means wrestling with GPU drivers, Docker configuration, and lots of other installation dependencies. That’s the opposite of what most businesses want from their infrastructure provider.

If you have been keeping an eye on the AI space, you’ll know that “agents” are the new hot trend. Most of what gets called an agent is really just a chatbot with a few extra hooks bolted on. Hermes isn’t that. It’s built on Nous Research’s open-weight Hermes models, and it’s designed to get things done – not just answer questions about them.

What is Hermes Agent?

Hermes is an open-source AI agent framework that runs entirely on your own infrastructure (self-hosted). Unlike the AI tools most businesses use today, nothing about how Hermes works requires sending your data off to a third party. The model, the conversation history, the documents it reads, the commands it runs – all of it stays on your server, under your control.

Stefano Sordini - CEO, NetShop ISP

“At NetShop ISP, we believe in data sovereignty. In fact, it’s deeply embedded in our DNA hence we’ve been helping businesses keep their data regional through our worldwide data center infrastructure for the past 22 years.”, said Stefano Sordini, CEO at NetShop ISP

That distinction matters more than it might sound. If your business handles client contracts, financial records, trading data, or anything else you’d rather not hand to an external API, running your own agent changes the conversation entirely. You get the benefits of AI assistance without the compliance headache of a third party holding your data.

What Hermes Agent Can Do

Once you get your Hermes AI Agent VPS is up and running, you can start getting it to do almost any repetitive or research-heavy task your team deals with day to day:

  • Emails filtering – reading, categorising, and drafting first-pass responses to incoming emails or tickets.
  • Log and monitoring summaries – optimizing a tsunami of server logs or alerts into a plain-English summary of what actually needs attention
  • Document search and internal knowledge base – answering questions from your own runbooks, wikis, and internal docs instead of generic training data
  • Content and drafting support – producing first drafts of client communications, reports, or internal documentation
  • Website and SEO auditing – crawling and assessing your own site for search and AI-answer-engine readiness

Something which we, at NetShop ISP, love about Hermes agent is its orientation for technical teams. It ships with a proper CLI, supports tool integrations and skills you can install on demand, and can be connected into an existing infrastructure.

Deploy your first Hermes AI Agent in One Click

Deployment works exactly like the rest of our VPS products: choose your desired Hermes Agent VPS plan from our website, proceed to checkout and deploy. Within minutes you will have a running agent, ready to be pointed at whatever task you want to hand it first.

If you are not sure where and how to start, please contact us and we will get in touch to assist further.

How To Protect Your Website from DDoS Attacks in 2026

In this article we break down the concrete steps to make your infrastructure resilient and protect your website from DDoS attacks in 2026.

DDoS attacks are no longer occasional spikes of bad traffic; they are a constant, industrialized part of the internet’s background noise. Cloudflare alone mitigated over 20 million attacks in a single recent quarter, and multiple threat-intelligence providers now track tens of millions of incidents a year across every sector, from eCommerce and iGaming to SaaS, Forex, and personal websites/blogs.

2026 is an interesting year in the sphere of cyber security. Attackers increasingly use AI-assisted tools to script attacks, probe defenses in real time, and rotate vectors the moment mitigation kicks in – turning what used to be a blunt flood into an adaptive, multi-layer campaign that hits the network and application layers simultaneously.

Hyper-volumetric attacks measured in multiple terabits per second, once rare, are now recorded regularly, while a large share of application-layer attacks last only seconds or minutes; just long enough to cause disruption before defenses can react.

Downtime is expensive. Industry surveys consistently put the cost of an hour of downtime well into five figures for many businesses, and the damage isn’t limited to lost transactions; it includes reputational harm and SEO impact that can take months to recover from. Protecting your website is no longer a “nice to have” but a necessity.

In this article we break down the concrete steps to make your infrastructure resilient in 2026.

1. Use Dedicated DDoS Mitigation Services

Standard firewalls are not built to absorb large or sustained attacks. Purpose-built mitigation platforms typically combine:

  • Automated, always-on detection
  • Real-time traffic scrubbing
  • Behavioral and anomaly-based analysis
  • Coverage across volumetric, protocol, and application-layer attack types

NetShop’s Advanced DDoS Protection comes as fully managed and supports detection at all layers (L1 – L7). Check out the DDoS Protections plans here.

2. Deploy CDN for Global Traffic Distribution

A Content Delivery Network (CDN) spreads incoming requests across many global points of presence, absorbing traffic surges before they reach your origin server.

Some of the benefits of adopting CDN into your infrastructure are:

  • Faster load times for legitimate visitors
  • Extra bandwidth headroom during traffic spikes
  • Reduced load on your origin infrastructure
  • Built-in redundancy against regional attack concentration

3. Implement Rate Limiting and Traffic Shaping

Application-layer (Layer 7) attacks are harder to detect because the traffic looks legitimate. What ddos appliances used to easily detect two years ago, today is becoming ten times harder.

Rate limiting and traffic shaping help contain:

  • Credential-stuffing and login abuse
  • API request floods (a growing target, especially for smaller businesses)
  • Aggressive scraping
  • Low-and-slow Layer 7 attacks designed to exhaust backend resources rather than bandwidth

4. Harden Your Web Server Configuration

Server-level hardening remains one of the highest-return, lowest-cost defenses:

  • Disable unused services and ports
  • Adjust connection limits and timeouts
  • Enable and configure caching
  • Run efficient web servers (Nginx, LiteSpeed) configured for high-concurrency loads

Fine-tuning as well as security hardening are services provided as part of NetShop’s Managed SLA plans.

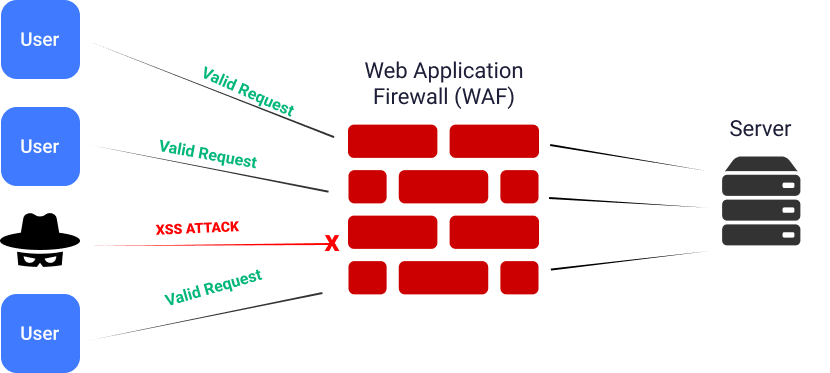
5. Use a Web Application Firewall (WAF)

Because so much of today’s attack volume targets the application layer, a WAF is essential rather than optional. It should block:

  • Malformed or malicious HTTP requests
  • Repetitive, bot-like request patterns
  • Known exploit signatures (including protocol-level exploits like HTTP/2 stream abuse)
  • High-frequency POST/API floods
DDoS Protection - Web Application Firewall - NetShop ISP

NetShop ISP offers two types of Firewalls; virtual and hardware. Both come as self-managed or fully managed, standalone or in high-availability mode.

6. Strengthen DNS Resilience

DNS remains a preferred target because taking down DNS takes down your site even if hosting itself is healthy. You can reduce this exposure by:

  • Using multiple, geographically distributed DNS providers
  • Enabling DNSSEC
  • Filtering abusive or misconfigured resolvers
  • Choosing DNS providers with built-in DDoS protection

A premium DNS hosting service supporting DNSSEC, failover, and Geo-based load balancing of requests can help you strengthen your infrastructure’s resilience.

7. Build and Test an Incident Response Plan

No defense is perfect, and a fast, rehearsed response minimizes damage when an attack gets through. As per best practices we have been implemented both internally and to various organizations, your incident response plan should define:

  • Emergency contacts and escalation paths
  • Monitoring thresholds that trigger action
  • Internal and external communication steps
  • Failover and rollback procedures
  • Regular simulated-attack drills so teams respond with confidence under real pressure

Key takeaways for your Website’s Protection from DDoS Attacks

DDoS attacks in 2026 are bigger, faster, and more adaptive than ever. The organizations that stay resilient are the ones that combine infrastructure-level protection (mitigation services, CDN, DNS resilience) with application-layer hardening (WAF, rate limiting, server tuning) and a tested incident response plan.

Choosing a hosting provider with built-in DDoS protection, scalable infrastructure, and security-focused support can make a real difference when an attack hits.

Explore our hosting security solutions to protect your platform in 2026 and beyond, or contact us to schedule a free consultation with our cybersecurity and infrastructure specialists.

Why Your Stream Keeps Buffering (And How to Fix It)

Buffering can wreck a streaming platform’s reputation in seconds, but most causes are fixable. In this article we explain what actually leads to interruptions, from bandwidth and routing to CDN gaps and server load, and how the right hosting setup keeps your streams running smooth.

Nothing kills a live stream faster than a spinning loading icon. Whether you’re running an IPTV platform, broadcasting a football match, or hosting a corporate webinar, that split-second freeze is often all it takes to lose a viewer for good. They won’t wait around to see if it clears up; they’ll switch tabs, close the app, or worse, tell their friends your platform is unreliable.

The frustrating part is that most buffering problems aren’t mysterious. They come down to a handful of well-understood issues in how the hosting and network side of a stream is set up.

Streaming - What is data buffer

In this article, we’ll break down the reasons why buffering occurs on streaming, and how can you can fix it.

Bandwidth Is Usually the First Culprit

If there’s one issue that causes more buffering complaints than anything else, it’s bandwidth. Every stream needs a certain bit rate to play cleanly, and if the hosting environment can’t keep pace with that, viewers are going to see stalls, dropped frames, or quality that keeps downgrading itself mid-stream.

This tends to catch people out more than they expect, especially once a platform starts to scale. A single HD channel is one thing; multiple channels, or 4K content, and bandwidth requirements climb fast.

A few things help here:

  • Run on servers built for high network throughput, not shared infrastructure that’s already stretched thin
  • Don’t oversell your bandwidth. If the numbers on paper only just cover peak demand, you don’t actually have headroom
  • Make sure your bitrate settings are realistic for the infrastructure you’re actually running on, not just what looks good in a spec sheet

Routing and Jitter Cause Problems Even When Bandwidth Is Fine

There is one thing a lot of people miss: you can have plenty of bandwidth and still get a choppy stream. That’s usually down to routing. If traffic is taking an inefficient path across the network, or bouncing between poorly peered networks, you end up with jitter.

In networking, jitter is the variation in the delay (or latency) of data packets arriving at their destination.

Jitter shows up as things like:

  • Video that stutters even though the connection “looks” fine
  • Audio drifting out of sync with the picture
  • Buffers filling and draining unpredictably
  • Streams freezing for a second or two, seemingly at random

None of this is really about capacity. It’s about the quality and consistency of the path data takes to get from server to viewer. Good peering relationships and properly optimised routing solve most of it. This is one of those areas where the underlying network matters just as much as the server itself.

Skipping a CDN Hurts More the Bigger Your Audience Gets

If you are streaming to people in one area/region, a single server setup might genuinely be fine. The moment your audience spreads out geographically, though, that same setup starts working against you. Every request has to travel back to one origin point, which adds latency and puts a growing load on your servers as more viewers tune in.

That’s the problem a CDN (Content Delivery Network) solves. It caches your content at points closer to the viewer, cutting down round-trip time and taking pressure off the origin server.

Without a CDN in place, your servers are handling every single request directly, and that’s exactly the kind of load that tips a stream from “smooth” into “buffering.”

Bad Encoding Settings Waste Bandwidth

Sometimes the infrastructure is fine, but the stream itself is poorly setup. Encoding that’s misconfigured (e.g. bitrates set too high, frame rates that aren’t consistent, or codecs the playback device doesn’t handle well) burns through bandwidth for no real quality benefit, and often causes exactly the buffering it’s trying to avoid.

Adaptive bitrate streaming is the fix most platforms should be using by default. It lets the stream adjust itself in real time based on each viewer’s actual connection, rather than forcing everyone onto a single fixed quality. Someone on a fast fibre connection and someone on mobile data both get a version of the stream that actually plays properly for them.

Servers That Can’t Keep Up With Processing Demands

Live streaming depends a lot on the hardware behind it: encoding, transcoding, and delivering video in real time is genuinely resource-intensive work. A server without enough CPU headroom, insufficient RAM, or no GPU acceleration will start to struggle as demand increases, even if the network side of things is solid.

Typical warning signs of this include:

  • Running several high-resolution streams on hardware that’s only really built for one
  • No hardware acceleration to offload the encoding workload
  • Other background processes quietly eating into the resources your stream needs

Getting Streaming Right with the Right Hosting

Buffering isn’t usually one big failure. It’s a combination of smaller things, any one of which can be enough to disrupt playback. Not enough bandwidth, poor routing, no CDN, sloppy encoding, or underpowered servers can each cause the exact same symptom: a viewer staring at a loading wheel instead of your content.

If you’re planning a streaming project and want the hosting side taken off your plate, that’s exactly where NetShop ISP comes in. From dedicated servers with real network headroom to CDN integration and routing built for live delivery, NetShop’s streaming infrastructure solutions are designed specifically for platforms that can’t afford to buffer.

For more information or to get a free quote please contact our Streaming hosting specialists https://netshop-isp.com.cy/contact-us/.

How to Secure Your WordPress Website in 2026

WordPress runs over 40% of the web which is exactly why it’s such a popular target. Most compromises don’t come from WordPress itself, but from the plugins, passwords, and server settings around it. Here are the practical steps that meaningfully reduce the risk.

WordPress powers more than 40% of all websites on the internet (Source: https://w3techs.com/technologies/details/cm-wordpress), making it the most widely used Content Management System (CMS) in the world. That same popularity is what puts it in the cross-hairs: attackers build automated tools that scan the web specifically for WordPress installations, probing for known weaknesses around the clock.

It is worth being clear about where the risk actually sits. The WordPress core software is generally well-maintained. The overwhelming majority of real-world compromises come from the layers around it:

  • third-party plugins and themes
  • weak credentials
  • weak server configuration.

Securing WordPress is therefore less about the core itself and more about disciplined administration of everything surrounding it. This article covers the practical steps to secure your WordPress website.

Why WordPress Security Matters

A compromise rarely stays quiet. Once attackers gain access, they typically use the site for whatever pays: injecting SEO spam (the classic pharmaceutical and counterfeit-goods keywords), planting phishing pages, running cryptominers that quietly consume server resources, or installing card skimmers on WooCommerce checkouts.

The knock-on effects are what hurt the business. A flagged site can be added to Google Safe Browsing, triggering the full-page red warning that drives away visitors. If the server is used to send spam, its IP can land on email blacklists, affecting legitimate mail. Recovery is about cleaning the infection, finding every backdoor and restoring trust with search engines. It almost always costs more than the prevention would have. The case for getting ahead of it is straightforward.

Common WordPress Security Risks

Weak Login Credentials

Weak and reused passwords remain the single most common cause of breaches. Attackers rely on two tactics here: brute force (trying thousands of combinations) and credential stuffing (testing username/password pairs leaked from unrelated data breaches, banking on password reuse). The default admin username makes their job easier still, because it removes half the guesswork.

Strong, unique passwords and a cap on failed login attempts neutralise most of this traffic.

Outdated Software

This is where the real exposure lives. Roughly nine in ten WordPress vulnerabilities trace back to plugins and themes rather than the core. Two patterns are especially dangerous: abandoned plugins that have not seen an update in years (the developer has moved on, but the vulnerability has not), and nulled or pirated premium plugins, which frequently ship with a backdoor already built in.

Malware Infections

Malware usually arrives through a vulnerable plugin, after which files are dropped somewhere quiet such as wp-content/uploads. What it does next varies: redirecting visitors, serving spam, harvesting data, or maintaining a hidden backdoor for re-entry.

That last point matters most. The visible symptom is often easy to remove; the backdoor that let the attacker in is not. Miss it, and the site is reinfected within days. Fast, thorough detection is what breaks that cycle.

Brute Force Attacks

Brute force attempts hammer two endpoints: the standard wp-login.php page and xmlrpc.php, the legacy XML-RPC interface. The latter is worth singling out as it can bundle many login attempts into a single request, effectively amplifying an attack and slipping past basic per-attempt limits.

Server-level rate limiting (for example, Fail2ban), a Web Application Firewall (for example, APF), and two-factor authentication together make these attacks impractical.

APF Firewall

Best Practices for Securing WordPress

Keep WordPress Updated

Enable automatic updates for minor core releases and for trusted plugins. For major version upgrades, test on a staging copy first. Just as importantly, delete plugins and themes you no longer use; a deactivated plugin still sits on disk and remains attack surface.

Use Strong Authentication

Use a long, unique password (16+ characters) for every administrative account, generated and stored in a password manager. Add two-factor authentication with preference for an authenticator app instead of the SMS option which can be intercepted. Avoid the admin username entirely, and limit login attempts so repeated failures lock out the source.

Install Security Monitoring Tools

Application-level plugins such as Wordfence or Sucuri and server-level scanners such as ImunifyAV catch different things, and using both gives broader coverage. A Web Application Firewall adds a further layer by blocking known exploit patterns before they ever reach WordPress. Continuous monitoring is what turns a silent compromise into an early alert.

Limit User Permissions

Apply the principle of least privilege. WordPress roles escalate from Subscriber through Contributor, Author, and Editor to Administrator. Reserve Administrator access for the few people who genuinely require it, so a single compromised account cannot take down the whole site.

Maintain Regular Backups

Follow the 3-2-1 rule: three copies of your data, on two types of media, with one stored off-site. Remember that a backup that gets encrypted alongside the live site in a ransomware event is no backup at all. Just as important, test a restore occasionally. A backup you have never restored is an assumption, not a safety net.

Harden Configuration and File Permissions

A few server-side settings close common gaps:

  • Set files to 644 and directories to 755; restrict wp-config.php further to 600 or 640.
  • Add define('DISALLOW_FILE_EDIT', true); to disable the built-in dashboard code editor, a favourite tool for attackers who gain admin access.
  • Change the default wp_ database table prefix to make automated SQL injection harder.
  • Force HTTPS across the whole site, and disable XML-RPC if nothing on the site relies on it.

The official WordPress hardening guide is a good reference for the full list: https://wordpress.org/support/article/hardening-wordpress/

The Hosting Environment Matters

In addition to the security hardening steps performed on site-level, one must not forget the environment where the website resides; the server itself. The hosting environment carries real responsibility for security: account isolation so a single compromised site cannot reach its neighbours, a server-level firewall and WAF, a current and supported PHP stack, automated malware scanning, and properly issued SSL. A well-configured platform absorbs a large share of the attacks before they ever reach the application, which is exactly why the choice of host is itself a security decision.

Staying Secure with NetShop ISP

WordPress security is not a one-time task but an ongoing process of monitoring and maintenance. No single measure is enough on its own; the protection comes from layering them — current software, strong authentication, least-privilege access, reliable off-site backups, and a hardened, well-managed hosting environment underneath.

The reality is that this is continuous, hands-on work: patches to apply, logs to watch, backups to verify, and incidents to respond to quickly when they happen. For many businesses, the day-to-day demands of running their own operation leave little room for it.

This is where a managed hosting partner earns its place. Taking ownership of the patching, monitoring, hardening, and recovery so that security is handled by people who do it every day, rather than left to chance.

For further information on how NetShop ISP’s managed services can help your business, contact our representatives for a free consultation.

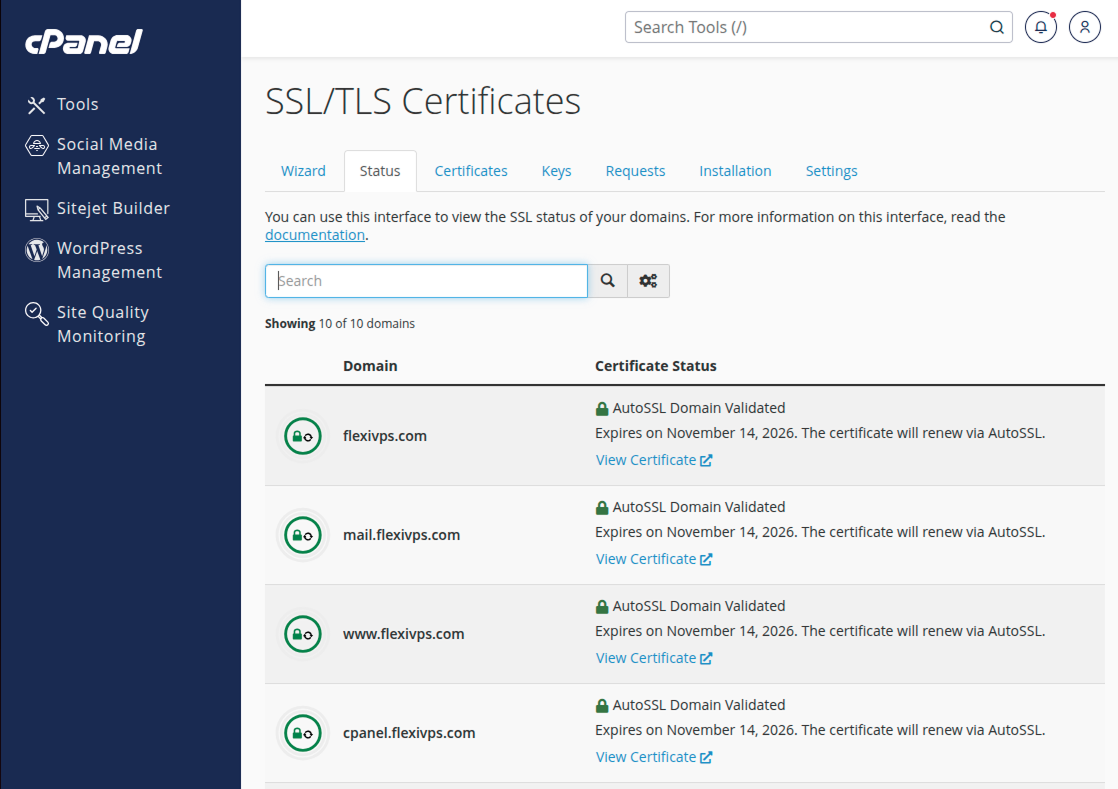
Why Your cPanel or WHM Login Page Is Showing an Outdated Theme (And How to Fix It)

Is your cPanel or WHM login page looking old and outdated? Learn what causes the legacy login theme to appear and follow these simple steps to fix it fast.

If you’ve recently noticed that your WHM or cPanel login screen looks different from what you’d expect, specifically older and more plain than usual, you’re not alone.

This is a known issue that server administrators occasionally encounter, and the good news is that it’s fixable in just a couple of minutes.

In this article, we’ll walk you through what causes this problem and exactly how to resolve it.

What Does the Problem Look Like?

Instead of the modern login interface, the server falls back to a legacy (outdated) login theme. In some cases, you may also notice error messages recorded in the cPanel error log, such as permission errors when the system tries to read certain files, or warnings stating that it failed to load the expected login template and is reverting to the legacy fallback.

These errors point to a common underlying problem rather than a cosmetic glitch.

What’s Actually Causing This?

The root cause is a corrupted or improperly responding template.stor data file. This file is responsible for rendering the correct login theme. When it becomes corrupted or returns an unexpected output, the server cannot load the modern login template and automatically falls back to the legacy design as a safety measure.

Additionally, incorrect file permissions on certain cPanel public contact files can prevent the system from reading required data, which triggers the same fallback behavior.

How to Fix It: Step-by-Step

You’ll need root SSH access to your server or access to the WHM Terminal to apply this fix.

Step 1: Resync your cPanel installation

Run the following command as root. This will resynchronize cPanel’s core files and repair all inconsistencies:

root@localhost:~$ /scripts/upcp --sync

Wait for the process to complete before moving on to the following step.

Step 2: Rename the problematic public contact file

Now, rename the file that may be causing the permission error. Renaming it (rather than deleting it) is a safe approach, as it preserves the original in case you need it later:

root@localhost:~$ mv -v /var/cpanel/public_contact{,.$(date +%s)}

This command appends a timestamp to the filename, effectively archiving it and allowing cPanel to regenerate it fresh.

Step 3: Verify the fix

Once both commands have been run, navigate to your WHM or cPanel login page and refresh. The modern login theme should now load correctly!

Preventing This Issue in the Future

While this problem can appear unexpectedly, keeping your cPanel installation regularly updated is the best preventive measure. Routine updates ensure that template files and dependencies stay consistent and less prone to corruption. You can also periodically run the upcp --sync command as part of scheduled server maintenance to catch and correct any data drift before it causes visible issues.

If you are looking to migrate your cPanel/WHM server from another provider, NetShop ISP offers free migration with any purchase of a Linux VPS or Dedicated server.

Enjoy a trouble-free hosting experience with a dedicated support team carrying more than fifteen years of experience in cPanel hosting. Contact our hosting specialists for more information or assistance.

NetShop ISP Wins Best Hosting Provider at the Global Forex Awards – B2B 2026

Leading hosting and infrastructure provider, NetShop ISP, wins Best Hosting Provider at the Global Forex Awards – B2B 2026.

NetShop ISP, a premier provider of dedicated servers, colocation, and cloud hosting solutions, is proud to announce that it has been named Best Hosting Provider at the prestigious Global Forex Awards – B2B 2026. The award recognizes NetShop ISP’s outstanding commitment to delivering high-performance, reliable, and secure hosting infrastructure tailored to the demanding needs of the global forex and financial services industry.

The Global Forex Awards – B2B is one of the most respected recognition programs in the institutional forex sector, honoring companies that demonstrate excellence, innovation, and superior service to brokers, financial institutions, and technology providers worldwide.

A Recognition of Excellence and Reliability

Winning this award underscores NetShop ISP’s dedication to providing ultra-low latency connectivity, 99.99% uptime guarantees, and enterprise-grade security; all critical requirements for forex brokers and financial technology firms operating in fast-moving markets. NetShop ISP’s strategically located data centers and robust network infrastructure ensure that clients can execute trades with speed, reliability, and confidence.

“We are truly honored to receive this recognition from the Global Forex Awards – B2B,” said Stefano Sordini, CEO NetShop ISP. “This award is a testament to the hard work of our entire team and our unwavering commitment to providing the financial industry with the hosting infrastructure it needs to compete at the highest level. We look forward to continuing to innovate and serve our clients with the highest standards of performance and reliability.”

Serving the Financial Industry with Cutting-Edge Infrastructure

NetShop ISP has built a strong reputation within the forex and fintech sectors by offering a comprehensive suite of services, including dedicated servers, colocation, VPS hosting, DDoS protection, and managed services. With data center facilities strategically positioned in key financial hubs, the company enables clients to minimize latency and maximize trading performance.

The company’s client-first approach, combined with its 24/7 technical support and customized infrastructure solutions, has made NetShop ISP a trusted partner for forex brokers, trading platforms, and financial technology companies around the globe.

About the Global Forex Awards – B2B

The Global Forex Awards – B2B is a prestigious awards program dedicated to recognizing excellence among institutional service providers in the global foreign exchange industry. The awards celebrate companies that demonstrate innovation, quality, and leadership in supporting the broader forex ecosystem.

Visit Global Forex Awards – B2B Website >

How To Use vFirewall for VPS Protection

Check out this step-by-step tutorial on how to use vFirewall for protecting your VPS server within the myNetShop Portal.

NetShop ISP has launched vFirewall – a new feature which allows customers to easily manage traffic rules for VPS servers.

In this tutorial, we’ll walk you through the process of creating, managing, and applying firewall rules step by step.

Step 1: Create a New Security Group

Before applying firewall rules to your VPS, you must first create a Security Group. A Security Group is a collection of rules that define which traffic is allowed or blocked.

  1. Navigate to the Firewall section in your client portal.
  2. Click on Create New Security Group.
  3. Fill in the following fields:
    • Security Group Name – Choose a descriptive name (e.g., WebServerRules).
    • Security Group Notes – Optional notes for internal reference.
    • Default Policy – Select the default behavior:
      • Allow All – Permits all traffic unless explicitly denied.
      • Deny All – Blocks all traffic unless explicitly allowed (recommended for best security).
  4. Add rules by specifying:
    • IP Type – IPv4 or IPv6.
    • Direction – Incoming (IN) or Outgoing (OUT).
    • Decision – Allow (ACCEPT) or Block (DROP).
    • Protocol – TCP, UDP, ICMP, etc.
    • Port – Enter a port (e.g., 22 for SSH) or a range (e.g., 80–443 for web traffic).
    • IP – Define a source/destination IP or use 0.0.0.0/0 for all.
  5. Click Create Security Group to save.

Step 2: Manage Security Groups

Once created, Security Groups can be managed under the Manage Security Groups tab. This is where you can edit, assign, or delete groups.

In this section you have the following options available:

  • Edit (✏️) – Update rules, name, or notes.
  • Assign/Unassign Group – Attach/detach a Security Group to/from a VPS (only one active group per VPS).
  • Delete Group (🗑️) – Remove a Security Group permanently.

📌 Tip: Do not delete a Security Group currently assigned to an active VPS unless you intend to remove its protection.

Step 3: Edit Security Group

You may update an existing Security Group at any time:

  1. From Manage Security Groups, click the Edit (✏️) icon.
  2. Update group name, notes, or default policy.
  3. Modify rules:
    • Add new rules or update existing ones.
    • For example, allow SSH on ports 22,2222 for all IPs (0.0.0.0/0).
  4. Click Save Rules to apply changes. Updates take effect immediately for all VPS servers assigned to this group.

Step 4: Active Security Group

When a Security Group is assigned to a VPS, it becomes the Active Security Group. All traffic filtering will be applied in real-time according to the rules defined.

In this section the following options are available:

  • Add/Modify Rules – Adjust traffic filtering directly.
  • Unassign Group – Detach the firewall rules from the VPS.
  • Delete Group – Permanently remove the group and its rules.

📌 Tip: Double-check that SSH (port 22) or RDP (port 3389) access is allowed before enabling a Deny All policy to avoid locking yourself out.

How to Choose the Best WordPress Hosting in 2026

This article breaks down what actually matters for WordPress Hosting in 2026. Learn what to look for in performance, security, scalability and support before choosing the right provider.

Choosing the right hosting provider is one of the most important decisions when launching a WordPress website. Hosting directly affects website performance, security, and reliability.

With many hosting providers available, understanding which features matter most can help website owners make informed decisions.

In this article we

Key Factors to Consider When Choosing a Hosting Provider

Performance and Speed

Website speed depends heavily on the infrastructure provided by the hosting environment. Servers equipped with modern hardware and optimized configurations help ensure fast loading times.

Fast storage technology and efficient server configurations can significantly improve WordPress performance.

Reliability and Uptime

Reliable hosting ensures that websites remain accessible to visitors at all times. Downtime can negatively affect business operations and search engine rankings.

Hosting providers should offer stable infrastructure and strong uptime guarantees.

Security Features

Security features such as firewalls, malware scanning, and automatic updates help protect WordPress websites from threats.

Secure hosting environments also implement server-level protections that reduce the risk of attacks.

Scalability

Websites often grow over time. Hosting solutions should allow easy upgrades so that resources can be increased as traffic expands.

Scalable environments help ensure that websites remain stable during periods of growth.

Technical Support

Technical support plays an important role in resolving issues quickly. Hosting providers with experienced support teams can assist with troubleshooting, migrations, and configuration questions.

Responsive support can help prevent minor issues from becoming major disruptions.

Types of WordPress Hosting

Shared Hosting

Shared hosting places multiple websites on a single server. While it is often the most affordable option, resources are shared between users.

This environment may be suitable for small websites with limited traffic.

VPS Hosting

Virtual Private Servers allocate dedicated resources within a virtualized environment. VPS hosting provides greater control, improved performance, and increased reliability compared to shared hosting.

Managed WordPress Hosting

Managed WordPress hosting environments are specifically optimized for WordPress. These platforms often include automatic updates, caching configurations, and enhanced security features.

Managed environments reduce the need for manual server management.

Evaluating Hosting Providers

When comparing hosting providers, website owners should review factors such as infrastructure quality, available resources, and performance optimizations.

Industry recommendations can also help website owners evaluate reliable hosting options. WordPress provides an official list of recommended hosting providers that meet specific performance standards.

Managed WordPress Hosting by NetShop ISP

Selecting the right WordPress hosting provider is essential for ensuring website performance, security, and scalability. By evaluating infrastructure quality, support availability, and performance features, website owners can choose hosting environments that meet their long-term needs.

As websites grow and evolve, reliable hosting solutions designed specifically for WordPress can help ensure consistent performance and stability for visitors.

The recently launched Managed WordPress hosting plans comes with free Domain Name, free SSL Certificate and free weekly backups, offering true peace-of-mind for website and business owners.

NetShop ISP Lines Up for the 5th FXCubic Mini-Football Tournament – 12 June 2026, Limassol

NetShop ISP participates at the 5th FXCubic mini-football tournament along 15 FX and fintech companies on the 12th of June 2026 in Limassol, Cyprus.

On Friday, June 12th, sixteen companies from across the FX and fintech world will lace up their boots at Wembley Mini Football in Limassol for the 5th edition of the FXCubic Mini-Football Tournament. NetShop ISP will be part of the lineup.

What began as a friendly industry initiative has grown into one of the most anticipated dates on the regional FX calendar. Participation is deliberately capped at sixteen teams, despite demand once again exceeding expectations; a decision that keeps the football competitive and every match meaningful.

This year’s field reflects how much the event has matured. Joining NetShop ISP are EC Markets, Equiti, Exness, Finatz, FXDS, FxPro, INGOT Brokers, OneRoyal, Paytiko, Pepperstone, STARTRADER, Swissquote, Tickmill, Ultimate Group, and XS.com.

For us at NetShop ISP, the appeal of this tournament goes well beyond the football. As a Cyprus-based infrastructure and managed hosting provider serving the FX and fintech sectors, much of our work happens behind the scenes. Events like this let us step out from behind the racks and spend a day with the people we usually meet over support tickets and email threads. It is one of the most genuine networking moments of the year.

A big thank you to FXCubic for the work that goes into organizing an event of this scale and quality. See you on June 12th in Limassol. May the best team win!

5 Signs Your Business Has Outgrown Shared or VPS Hosting

In this article, we’ll walk you through five clear signs that your business has outgrown shared or VPS hosting, and what to think about before making the move to a dedicated server.

Most businesses start their online journey on shared hosting or a basic VPS plan. These options are affordable, easy to manage, and perfect for the early stages. But as your online presence grows, your infrastructure needs grow with it. After a certain point, performance limits, security challenges, and resource restrictions become hard to ignore.

In this article, we’ll walk you through five clear signs that your business has outgrown shared or VPS hosting, and what to think about before making the move to a dedicated server.

1. Your Website Slows Down During Busy Periods

One of the first clues that your hosting plan isn’t keeping up is recurring performance issues. You might notice things like:

  • Slow page loading during peak traffic
  • API timeouts
  • Delayed database responses
  • Sudden spikes in CPU or RAM usage

These usually suggest that your application has outgrown the virtualized resources in shared hosting or VPS servers. On a VPS, you may also be affected by the “noisy neighbor” problem, where another tenant consumes more than their share of system resources.

A dedicated server removes this risk entirely. With full control over the hardware, you get consistent performance even when traffic surges unexpectedly. Learn more about our dedicated hosting options.

2. Your Application Needs More Storage Speed Than a VPS Can Provide

Disk performance often gets overlooked, but it plays a major role in keeping applications fast and responsive. Systems that depend heavily on database operations, such as CRMs, eCommerce platforms, igaming infrastructures, and financial tools, can suffer noticeably when storage I/O is slow.

If your team is dealing with sluggish queries, indexing delays, or read/write bottlenecks, it may be time to upgrade. Dedicated servers with NVMe storage offer significantly higher throughput, helping ensure your application is not held back by shared disks.

3. You Need Advanced Customization or Full Control of the Operating System

VPS hosting offers flexibility, but there are still limits to what you can modify. Some applications require things like:

  • Custom kernel modules
  • Proprietary drivers
  • Special network configurations
  • Unique security setups

These are often restricted or unavailable in virtual environments. A dedicated server gives you full control over everything from the operating system and hardware choices to BIOS configurations and network settings. This is ideal for businesses running specialized workloads or resource-heavy applications.

4. Compliance or Security Requirements Call for Isolation

If your business works with sensitive data or must meet regulatory standards such as PCI-DSS, GDPR, HIPAA, or iGaming requirements, shared infrastructure might no longer be suitable.

Dedicated servers offer physical separation from other clients, which reduces risk and simplifies compliance audits. For many organizations, isolated hardware is not just a preference; it is a requirement.

5. Your Hosting Costs Are Becoming Hard to Predict

Many businesses discover that as their needs grow, VPS or cloud hosting becomes unexpectedly expensive. Between overage charges, bandwidth costs, CPU boosts, and storage expansions, monthly invoices can balloon.

A dedicated server provides predictable, fixed pricing, which makes budgeting straightforward. As your business scales, having predictable infrastructure costs becomes a major advantage.

Scale your business with a Dedicated Server today

If any of these signs feel familiar, it may be time to explore whether a dedicated server is the right next step for your business. Upgrading is not just about getting more power. It is about building a stable, reliable foundation that can support long-term growth.

Take the next step and see how NetShop ISP’s dedicated servers can help your business run faster, more securely, and with predictable costs. Contact our solution architects today.

Security Advisory: Copy Fail Vulnerability (CVE-2026-31431) Affects Major Linux Distros

A high-severity Linux kernel vulnerability (CVE-2026-31431 / CopyFail) has been disclosed affecting a wide range of popular distributions including Debian, Ubuntu, RHEL, AlmaLinux, and more. We strongly urge all customers running Linux-based servers to apply the mitigation immediately — no reboot required.

A Linux kernel vulnerability has been disclosed that affects a wide range of distributions currently in active use. We strongly urge all customers running Linux-based servers to apply the mitigation detailed below as soon as possible.

The vulnerability was identified by the U.S. Cybersecurity and Infrastructure Security Agency (CISA) on May 1st, 2026.

What is Copy Fail?

CVE-2026-31431, dubbed Copy Fail, is a vulnerability in the Linux kernel’s algif_aead cryptographic module. If exploited, it can potentially be leveraged by a local attacker to cause system instability or escalate privileges. Given the broad range of affected distributions, we consider this a high-priority item that should not be left unpatched.

Which Linux Distros Are Affected

If you are running any of the following operating systems, your server is likely vulnerable:

  • Debian 12 / 13
  • Ubuntu 22.04 / 24.04 / 26.04
  • RHEL, AlmaLinux, Rocky Linux
  • SUSE / openSUSE
  • Arch Linux, Gentoo, Amazon Linux, Oracle Linux

How To Apply the Mitigation

The fix disables the vulnerable algif_aead kernel module — preventing it from loading at boot and unloading it immediately if currently active. Run the following commands as root:

root@localhost:~$ echo "install algif_aead /bin/false" > /etc/modprobe.d/disable-algif.conf
root@localhost:~$ rmmod algif_aead 2>/dev/null || true

This is a safe, non-destructive change and does not require a reboot to take effect.

If you need assistance applying this fix or are unsure whether your server is affected, please open a support ticket and our team will be happy to help.