Goodbye Skype! Dedicated Support Continues via Teams & Slack
NetShop ISP, a leading global hosting provider, announces the official phase-out of Skype from its customer communications, effective May 5th, 2025.
Following Microsoft’s announcement to discontinue Skype on the 5th of May 2025, we would like to inform all our customers and partners that all NetShop ISP teams have fully transitioned to Microsoft Teams since April 2nd.
The transition reflects NetShop ISP’s decision to streamline customer communication by moving all Skype-based chats to Microsoft Teams, ensuring continued efficiency and responsiveness in client support interactions.
In addition to Teams, NetShop ISP maintains an active presence on Slack. This channel of communication is reserved for existing partners , as well as customers subscribed to our Premium SLA Gold package. This ensures a streamlined, high-touch experience for those who rely on rapid, always-on technical assistance.
Key Points of the Transition:
Skype support will officially end on May 5th, 2025.
Microsoft Teams is now the default platform for technical and sales queries.
Slack support remains available for premium customers and active partners.
Customers are advised toclean up any legacy Skype chats,removing users who are no longer active to ensure smooth communication.
If you have any questions or require assistance during this transition, our support team is ready to help.
Thank you for your understanding and cooperation. We look forward to continuing our collaboration through Microsoft Teams or Slack.
NetShop ISP Unveils Revamped Website With Modern UI & Improved Navigation
NetShop ISP, a leading global hosting provider, is proud to announce the launch of its newly revamped website, designed to offer a modern user interface, enhanced navigation, and a significantly richer content experience
NetShop ISP, a leading global hosting provider, is proud to announce the launch of its newly revamped website https://netshop-isp.com.cy, designed to offer a modern user interface, enhanced navigation, and a significantly richer content experience for its global customer base.
With a content-first approach, the new website reflects NetShop’s continued commitment to delivering an intuitive and informative online experience for businesses, developers, and IT professionals. The redesign project was focused on improving usability, increasing visibility for the company’s extensive hosting solutions, and providing centralized access to a growing library of technical resources.
“This redesign wasn’t just about aesthetics — it was about transforming how users interact with our content. We’ve streamlined the architecture, optimized performance, and created a content-rich ecosystem that supports every type of user, from entry-level customers to experienced sysadmins,” said Revekka Kalli, Project lead developer at NetShop ISP.
Key Highlights of the Website Revamp:
Modernized UI & Navigation A fresh, intuitive interface with a full-width mega menu design improves discoverability and usability across all major sections.
Content-Centric Structure New and existing content (tutorials, whitepapers, product documentation, and industry updates) is now easily accessible under a dedicated Resources section.
Enhanced Hosting Product Visibility Visitors can now seamlessly explore NetShop ISP’s full suite of services, including Cloud VPS hosting, Bare-Metal Servers, and custom solutions, all within improved menu structures and sub-page layouts.
Technology Partner Showcases A newly launched section under Solutions > Forex highlights integrations with top-tier Forex technology providers. View the section here.
New Data Center Pages Learn more about NetShop ISP’s expansion with detailed pages for its new data center locations; CY05 in Cyprus and SG05 in Singapore.
Built for Performance
The website has been redeveloped using React, one of the most modern web frameworks, ensuring lightning-fast page loads with an average loading time of 1.1 seconds—a significant improvement that supports user engagement and SEO performance.
Learn about the Cloud hosting trends to watch in 2025, and how Bare Metal Servers, Hybrid Cloud and Web3 hosting solutions are transforming the web hosting sector.
Cloud hosting is evolving rapidly, driven by increasing demands for performance, reliability, and control. In 2025, four major trends are reshaping the hosting landscape: bare metal servers, hybrid and multi-cloud strategies, and decentralized cloud solutionsfor Web3.
These advancements are particularly significant for Forex & Finance, web hosting providers, and web development companies, where every millisecond, performance and security can impact business success.
In today’s article I am sharing my insights with practical examples in two industries which we hold more than 60% of our clientele; Forex, IT / Development and the fast-growing Web3.
The Rise of Bare Metal Servers
Traditional cloud hosting relies on virtual machines (VMs), where multiple customers share a physical server. This model is cost-efficient but introduces performance overhead, latency, and security concerns. Bare metal servers eliminate these issues by offering dedicated, single-tenant infrastructure with direct access to hardware resources.
High-performance Trading Infrastructure for Forex Brokers
A Forex brokerage firm operating in London uses a cloud server instance for hosting its MetaTrader 5 (MT5) trading platform. However, traders complain about slippage and execution delays due to virtualization overhead.
To solve this, the company migrates to a bare metal server in LD4 (Equinix London Data Center). The result? Order execution times improve by 30-40%, significantly reducing slippage and improving client satisfaction.
High-Traffic WordPress Hosting
A web hosting company specializes in managed WordPress hosting for e-commerce businesses. Some of their largest clients experience traffic spikes, leading to slowdowns on traditional cloud instances or VPS servers.
By switching to bare metal servers, the e-shop platform gains consistent CPU performance, NVMe storage speeds, and dedicated network bandwidth, ensuring the website remains fast even during peak traffic.
Hybrid and Multi-Cloud Strategies
Many businesses no longer rely on a single cloud provider due to concerns over downtime, pricing, and data sovereignty. Instead, they adopt a Hybrid approach towards cloud hosting where they mix servers and resources from both private and public cloud providers.
Hybrid Cloud Setup for a Forex Broker
A Forex brokerage requires the maximum uptime guarantee to provide continuous access to trading accounts and uninterrupted price stream (ticks) to its trading platform. Relying solely onone cloud provider, e.g. AWS, presents many risks such as:
The company will become vendor-locked to the cloud provider making it difficult to “escape” at any time in the future
Cloud providers are known to be expensive for data traffic usage, something which may not be clearly visible in the beginning
In case of network or other issues, the FX broker has no alternative provider for fail over.
To mitigate the above cases, it is common for customers to follow this approach:
Run primary services on one hosting provider, such as NetShop ISP
Replicate critical data and backup servers to a reputable cloud hosting provider
Hybrid Cloud for a Software Development Agency
It is wide known that developers like working with public cloud providers due to the plethora of 1-click deployment tools they offer which makes their life easier. However, the best approach to be followed is to split the infrastructure into, at least, two hosting providers. Here’s a working scenario from a successful software development company in Cyprus:
This agency builds high-traffic websites and e-shops. They maintain a private cloud for staging and development but rely on a public cloud provider for the production environment.
They use on-premise bare metal servers for testing and version control.
Once projects are ready, they deploy to a public cloud provider for scalability.
This hybrid setup ensures secure internal development while benefiting from the scalability of the public cloud.
Decentralized Cloud and Web3 Hosting
Decentralized cloud hosting is gaining traction as businesses look for censorship-resistant, secure, and resilient alternatives to traditional cloud providers. Web3 hosting leverages blockchain-based networks to distribute data across multiple nodes instead of central data centers.
Decentralized Hosting for Forex Analytics
A regulatory reporting services firm offers business intelligent analytics to regulated Forex brokers but doesn’t want to rely on public cloud providers (AWS, Azure, Google Cloud) due to privacy concerns.
They move their data storage to a decentralized cloud solution like Sia or Filecoin, ensuring:
Data redundancy across a global network.
No single point of failure, making the system resistant to outages.
Enhanced security, as data is encrypted and split across multiple nodes.
Web3 Hosting for a Web Development Agency
A web development firm builds websites for clients in regulated industries (finance, crypto, and fintech). Some of their clients require uncensorable websites that cannot be taken down by governments or cloud providers.
Instead of using traditional hosting, they deploy websites and client portals on:
IPFS (InterPlanetary File System), distributing site data across a peer-to-peer network.
Ethereum Name Service (ENS) for blockchain-based domain names that are resistant to DNS takedowns.
This Web3 hosting model ensures content remains accessible, even if authorities attempt to shut down or censor the website.
Summary of 2025’s Hosting Trends
Cloud hosting in 2025 is evolving beyond traditional models. Bare metal cloud servers are eliminating performance bottlenecks, hybrid and multi-cloud strategies are enhancing reliability, and decentralized Web3 hosting is introducing a new era of censorship-resistant, secure hosting.
For Forex brokers, web hosting providers, and web development firms, adapting to these trends is crucial for staying competitive. Whether optimizing trade execution speeds, ensuring redundancy, or exploring decentralized cloud solutions, businesses must embrace these innovations to future-proof their operations.
Contact NetShop ISP for free advise and consultation on any of the following:
Bare metal cloud servers in strategically-chosen regions all over the world.
Hybrid cloud solutions to ensure business continuity and avoid becoming vendor locked.
Web3 hosting solutions for decentralized applications.
About the Author
Stefano Sordini, CEO and Founder of NetShop ISP, brings 20 years of experience in the hosting industry, with half of his career dedicated to serving the financial services and gambling sectors. During this time, he has gained deep expertise in critical application hosting solutions and low-latency network optimization.
How To Install Virtualizor KVM on Ubuntu 22.04
As KVM (Kernel-based Virtual Machine) is one of the most popular open source virtualization technologies, this article is dedicated to provide all steps for a successful installation of Virtualizor KVM on Ubuntu 22.04 server.
Virtualizor is a powerful web based VPS Control Panel that allows users to deploy and manage VPS on servers with a single click. Virtualizor supports KVM, Xen, OpenVZ, Proxmox, Virtuozzo, LXC, etc.
As KVM (Kernel-based Virtual Machine) is one of the most popular open source virtualization technologies, this article is dedicated to provide all steps for a successful installation of Virtualizor KVM on Ubuntu 22.04 server.
Steps to Install Virtualizor on Ubuntu 22.04
Before you start the installation process make note of the pre-requisites.
Pre-requisites
An active VPS or Dedicated Server with Linux Ubuntu 22.04
Server access with ‘root’ or sudo privileged user.
Storage space (ideally dedicated / separate from OS disks) to use it for VPS provisioning
Valid paid or trial license by Softaculous. Click here to obtain a Virtualizor license.
Step 1 – Install Ubuntu 22.04
Proceed with the installation of Ubuntu 22.04 LTS (22.04.05 64-bit) on your server. You can choose all default options that are presented during installation, however for disk partitioning do the following:
at least 4 GB for “swap”
at least 1 GB for “boot”
rest for “/” root partition
Step 2 – Prepare the OS Environment
During installation you have chosen a custom username and password. By default in Ubuntu 22.04 the “root” user is not configured so you will need to access your server via SSH using the username/password you have chosen during installation.
As soon as you have connected on your server proceed with the following steps:
2.1. Configure password for “root” user
user@localhost:~$ sudo su
Enter the password of the user you chosen during installation. If successful, you will enter the root account.
root@localhost:~$ passwd
Enter your desired password for “root” user. You need to enter it twice.
2.2. Update & Upgrade all packages
root@localhost:~$ apt update && apt upgrade -y
2.3. Allow Root Login
Edit the file /etc/ssh/sshd_config
Locate the line that starts with PermitRootLogin and edit it as follows: PermitRootLogin yes
Save & exit the file
Restart sshd service using command: service sshd restart
Step 3 – Install Virtualizor KVM
The installation script will check for a valid license (trial or paid) for your server’s IP address. Before you start the following steps, ensure you have a valid Virtualizor license by Softaculous.
3.1. Execute the following commands to install Virtualizor KVM on your Ubuntu 22.04 server:
root@localhost:~$ cd /root/ && wget -N http://files.virtualizor.com/install.sh
Then set the appropriate permissions to the install.sh file as follows:
root@localhost:~$ chmod 0755 install.sh
Finally, run the following command – this will get the magic started! Please note that the email you will use in the command below, should be the email address you used to obtain the Virtualizor license at https://www.softaculous.com/clients
Note: At this point, we suggest that open a new SSH terminal to monitor the the installation process using the following command. This will help you identify any possible errors which may cause the installation process to stop.
root@localhost:~$ tail -f /root/virtualizor.log
Step 4 – Restart Server & Enjoy the Virtualizor Admin Panel
If all went well with the installation process, you will be asked to reboot the server.
Restart your server using the following command and then you should be able to access the Admin Panel via your browser https://ip_address:4085
root@localhost:~$ shutdown -r now
Best Virtualizor Server Hosting by NetShop ISP
Join hundreds of other hosting companies and individuals who have trusted NetShop ISP for hosting Virtualizor KVM.
NetShop ISP offers a variety of Virtual Servers (VPS) and Dedicated Server plans, all optimized for the best performance of Virtualizor KVM. Deploy Linux VPS or Order a Dedicated Server today!
In addition to the affordable pricing of our hosting plans, NetShop ISP carries a decade of experience in deploying, managing and optimizing the Virtualizor KVM software.
NetShop ISP Appoints Yiota Pingou as Chief Technology Officer
NetShop ISP, leading cloud & hosting solutions provider, announce the Promotion of Yiota Pingou to the position of Chief Technology Officer (CTO).
NetShop ISP, a leading provider of data center services and server hosting solutions, is pleased to announce the promotion of Yiota Pingou to the position of Chief Technology Officer (CTO).
This strategic appointment underscores the company’s commitment to technological innovation and excellence in the hosting and data center industry.
A Proven Leader in Technology
Yiota Pingou has been an integral part of NetShop ISP’s team for over a decade. Her journey with the company began in 2014 when she joined as a Junior Web Developer. Demonstrating exceptional skills in managing tasks with tight deadlines and proposing solutions for complex infrastructure projects, Yiota quickly advanced through various roles, including Senior Developer and Head of Development department.
In these capacities, she played a pivotal role in advancing NetShop ISP’s IT operations by developing and orchestrating advanced technology solutions that later became core components of the company’s self-provisioning hosting services.
Driving Innovation and Expansion
In her new role as CTO, Yiota will oversee NetShop ISP’s global technology strategy, focusing on enhancing the company’s cloud ecosystem and integrating cutting-edge technologies to meet the evolving needs of clients.
Her leadership will be crucial in steering the company’s technological direction as it continues to grow and adapt in a rapidly changing industry.
“Yiota’s promotion to CTO is a testament to her unwavering dedication, innovative mindset, and profound understanding of our technological landscape,” said Stefano Sordini, CEO of NetShop ISP. “Her passion for new technologies, loyalty, passion and expertise will undoubtedly propel NetShop ISP to new heights, ensuring we remain at the forefront of the hosting and data center services industry.”
Founded in 2004 in Cyprus, NetShop ISP has evolved from a local hosting provider into a global leader with a presence in over 16 data centers worldwide, including strategic locations in Cyprus, Malta, the United Kingdom, the Netherlands, Singapore and Brazil.
For more information about NetShop ISP and its services, please visit https://netshop-isp.com.cy.
NetShop ISP Kicks Off 2025 with Impact at iFX EXPO Dubai
NetShop ISP Makes Impact with Innovative Hosting Solutions during iFX EXPO 2025 in Dubai
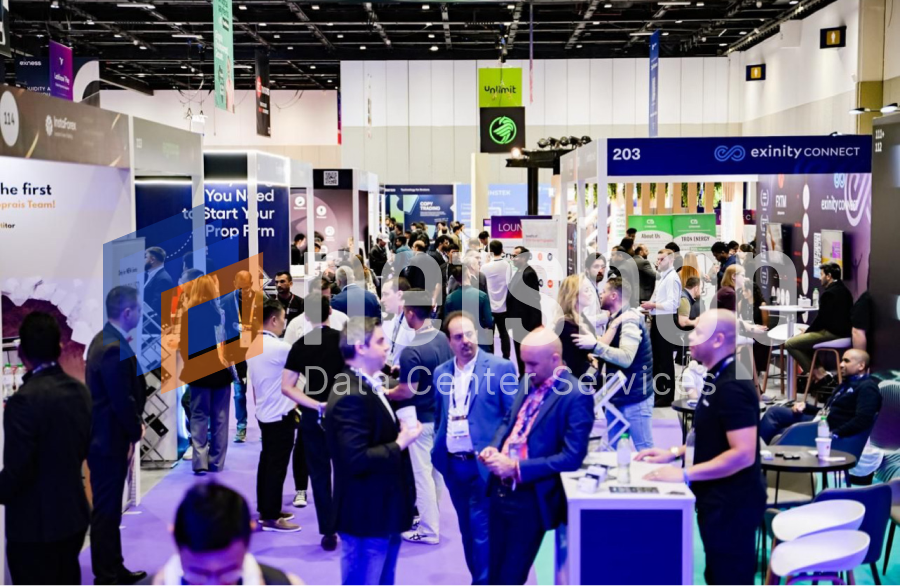
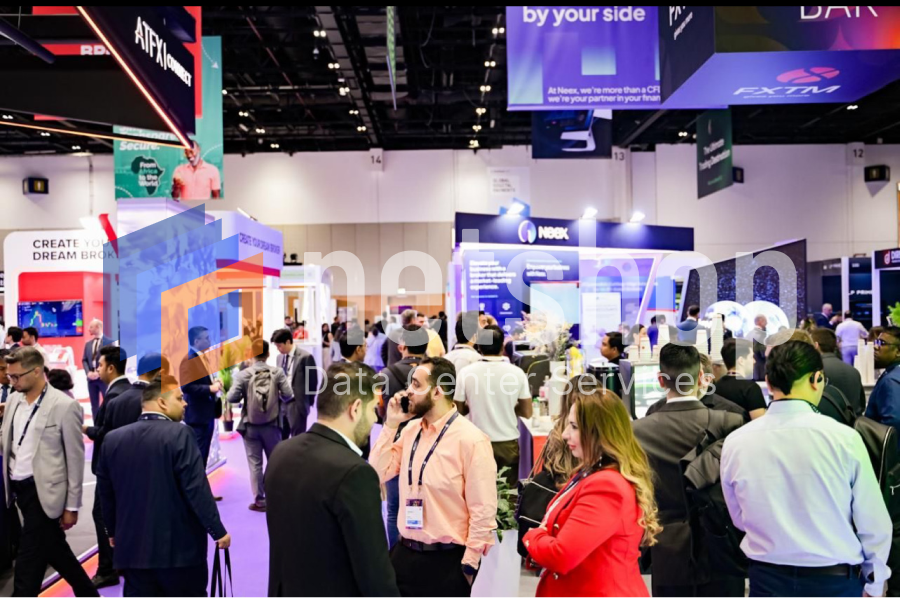
NetShop ISP is pleased to announce its successful participation in the iFX EXPO Dubai 2025, held from January 14 to 16 at the Dubai World Trade Centre. This premier event brought together over 10,000 professionals from the financial services industry, including brokers, investors, and technology providers.
Day #1 at IFX EXPO 2025 DubaiDay #2 at IFX EXPO 2025 Dubai
At the expo, NetShop ISP showcased a suite of hosting solutions tailored for the forex and fintech sectors. Key offerings included:
Trading Platforms Hosting: Dedicated servers optimized for MT4 and MT5 platforms powered with new generation CPU and fast NVMe storage.
Premium Bandwidth & Connectivity: High-speed, low-latency network infrastructure designed to meet the demands of high-frequency trading environments.
Forex VPS with API: An API-enabled service allowing brokers to offer ultra-low latency VPS servers to traders, enhancing trading performance.
DDoS Protection Service: Robust mitigation solutions to safeguard online businesses from potential cyber threats, minimizing downtime and ensuring business continuity. Learn more about Forex DDoS Protection service here.
Stefano Sordini, CEO NetShop ISP, at iFXEXPO Dubai 2025
Stefano Sordini, CEO of NetShop ISP, engaged with partners and clients throughout the event, discussing the company’s recent global infrastructure expansions and reaffirming its commitment to delivering cutting-edge hosting solutions for the financial services industry.
One of the key highlights of NetShop ISP’s presence at iFX EXPO Dubai 2025 was the unveiling of its newly optimized infrastructure for high-frequency trading and algorithmic platforms. This infrastructure, now available in key global financial hubs within the Equinix IBX (LD4, LD7, SG5), offers brokers and trading firms unmatched reliability and speed, which are critical for maintaining a competitive edge in today’s markets. Attendees were also impressed with the company’s flexible Forex VPS solutions, which cater to traders of all levels, from retail users to institutional investors.
NetShop ISP to Announce Expansion in New Data Centers during the iFX EXPO Dubai 2025
NetShop ISP to Attend iFX EXPO Dubai 2025 and Announce Expansion in New Data Centers.
NetShop ISP, a leading global hosting provider, is thrilled to announce its participation in the upcoming iFX Expo Dubai 2025, taking place from January 14-16 at the Dubai World Trade Centre. Known as the largest financial B2B expo, iFX Expo provides the perfect platform for us to connect with the global finance and trading community while unveiling our latest innovations and expansions.
Strategic Expansion in Asia and the United States
As part of our ongoing commitment to supporting the financial industry’s growing demands, NetShop ISP will announce the expansion of its infrastructure within two new state-of-the-art data centers. These new facilities are located within the prestigious Equinix International Business Exchange (IBX) in flagship financial hubs:
Singapore (South-East Asia): A key market for Forex and financial trading, this facility is strategically positioned to offer low-latency connectivity and robust infrastructure to cater to the region’s burgeoning demand for reliable hosting solutions.
New York, USA: Situated in one of the leading financial centers, this new data center provides unparalleled connectivity and support for financial institutions and fintech providers.
Tailored Solutions for the Financial Industry
At iFX EXPO Dubai, NetShop ISP will showcase its specialized hosting solutions designed to meet the unique requirements of the finance and trading sectors. These include:
Low-Latency Trading Infrastructure: Optimized network infrastrucure that facilitates low-latency and secure connectivity between Forex brokers and Liquidity Providers.
Scalable Cloud Solutions: Off-the-shelf and purpose-built cloud hosting solutions for Brokers, CRM and other technology providers within the financial services industry.
Managed DDoS Protection: Advanced DDoS protection offered within NetShop’s global data centers infrastructure.
Stefano Sordini, CEO, will represent NetShop ISP at the expo, alongside a team of fintech infrastructure experts. Visitors are encouraged to book a meeting to find out how our hosting solutions can empower their businesses and learn more about the capabilities of our new data centers.
“iFX Expo is an incredible opportunity to engage directly with the financial community and we’re eager to demonstrate how NetShop ISP is driving innovation and enabling success for FX brokers, fintech companies, and trading platforms worldwide.” said Stefano Sordini, CEO at NetShop ISP
Join Us in Shaping the Future of Financial Hosting
NetShop ISP invites attendees to discover how our global hosting solutions can elevate their operations. Whether you’re a broker, fintech startup, or trading platform, our team is ready to provide customized hosting solutions that match your needs. Book a Meeting.
How To Upgrade Server from Debian 10 (Buster) to Debian 12 (Bookworm)
This guide explains how to manually upgrade your Debian server from version 10 (Buster) to version 12 (Bookworm) safely and efficiently.
Upgrading your Debian server ensures you benefit from the latest features, security updates, and performance improvements. The latest stable Debian distribution (at the time of writing this tutorial) is Debian 12 (bookworm) 12.8.0.
This guide explains how to manually upgrade your Debian server from version 10 (Buster) to version 12 (Bookworm) safely and efficiently.
Important: Upgrading from Debian 10 (Buster) to Debian 12 (Bookworm) should typically be done in stages. Skipping an intermediate release (Debian 11, Bullseye) could introduce unexpected issues due to changes in dependencies and configurations. The recommended upgrade path is sequential: first from Debian 10 to 11, and then from 11 to 12.
Prerequisites
Before proceeding to the upgrade task, ensure the following:
In the following commands we assume you have root access on the server. In your case, if you will be using a sudo-privileged account, prepend the “sudo” to each command.
Edit /etc/apt/sources.list to replace all occurrences of buster with bullseye:
root@my-server:~# deb http://deb.debian.org/debian bullseye main contrib non-freeroot@my-server:~# deb http://security.debian.org/debian-security bullseye-security main contrib non-freeroot@my-server:~# deb http://deb.debian.org/debian bullseye-updates main contrib non-free
Save the file and exit.
Step 1.3: Perform Upgrade to Debian 11
Now that our sources list is updated, we are ready to proceed with the upgrade from Debian 10 to Debian 11.
Edit /etc/apt/sources.list to replace all occurrences of bullseye with bookworm:
deb http://deb.debian.org/debian bookworm main contrib non-free deb http://security.debian.org/debian-security bookworm-security main contrib non-free deb http://deb.debian.org/debian bookworm-updates main contrib non-free
Save the file an exit.
Step 1.3: Perform Upgrade to Debian 12
Now that our sources list is updated, we are ready to proceed with the upgrade from Debian 11 to Debian 12.
If no errors appeared, proceed with a server restart using the following command:
root@my-server:~# reboot
Once the server is back online, confirm the system is running on Debian 12 using this command:
root@my-server:~# lsb_release -a
You can verify you are on Debian 12 if you see the following output:
No LSB modules are available.
Distributor ID:	Debian
Description:	Debian GNU/Linux 12 (bookworm)
Release:	12
Codename:	bookworm
Congratulations! You have successfully completed a gradual upgrade from Debian 10 to Debian 12!
Upgrading your server is an essential task for maintaining a secure and efficient environment. If you prefer expert assistance, NetShop ISP offers fully managed services for all server needs. Contact one of our server specialists today.
2024: A Landmark Year in NetShop ISP’s History
Reflecting on 2024: Read all that happened within a very successful year at NetShop ISP
As we conclude 2024, NetShop ISP proudly reflects on a year marked by significant achievements and milestones that have reinforced our position as a global leader in hosting and data center solutions.
Global Infrastructure Expansion
In July, we launched our private infrastructure within the LD4 Data Center, part of the Equinix International Business Exchange (IBX). This strategic expansion enables us to offer enhanced services, including Dedicated Servers, Virtual Private Servers (VPS), Colocation, Cross-connect, and DDoS Protection, to our clients seeking robust and reliable hosting solutions.
August witnessed our entry into the Latin American market with the introduction of NVMe-powered VPS plans in São Paulo, Brazil. This development underscores our commitment to providing top-tier services to a broader clientele and meeting the growing demand for high-performance hosting solutions in the region.
Product Enhancements and Innovations
Our dedication to continuous improvement is evident in the series of product enhancements introduced throughout the year:
May: We revamped our Status Updates interface, offering an improved user experience with better visibility of scheduled maintenance and reported incidents.
June: The rollout of NVMe-powered Cloud nodes in our Cyprus data center provided customers with the opportunity to deploy Virtual Servers featuring blazing-fast NVMe storage.
July: We unveiled bespoke virtual server plans designed specifically for provisioning Access Servers for the popular FX trading platforms MetaTrader 4 and MetaTrader 5, catering to the unique requirements of the trading community.
August: The introduction of our Firewall Management Tool (FMT) in beta allowed customers with Windows virtual and dedicated servers to seamlessly manage their Windows Firewall directly from the myNetShop portal.
September: We completed a significant network infrastructure upgrade at our LD7 facility, increasing our public network capacity to 10G. This enhancement benefits customers with Dedicated Servers, VPS, and co-located equipment, ensuring faster and more reliable connectivity.
October: The launch of Smart Search enhanced the navigation experience within the myNetShop Portal, enabling customers to search for invoices, service labels, IP addresses, ticket subjects, and more with ease.
November: We implemented major UI improvements to the myNetShop Portal, including the introduction of a dark theme, a redesigned service details page, enhanced VPS service management with detailed resource utilization graphs, and improved product order pages for better service customization.
“The innovations we’ve introduced this year reflect our focus on delivering cutting-edge solutions that empower our clients to succeed in a rapidly changing digital landscape.”
— Yiota Pingou, Head of Development
Industry Engagements and Milestones
Our active participation in key industry events has been instrumental in fostering innovation and collaboration:
October: At the Forex Expo Dubai 2024, we showcased our cutting-edge hosting solutions tailored for the financial services industry, reinforcing our commitment to supporting the forex trading community. Read the Article
December: We led conversations on AI trading at the Cyprus Fintech Summit 2024, highlighting our role as a trusted partner to the global fintech community and our dedication to advancing technological integration in financial services. Read the Article
“Our achievements in 2024 are a testament to our team’s dedication and our commitment to meeting the evolving needs of our clients. We look forward to building on this momentum in the coming year!”
— Elena Efthymiou, Operations Manager
Celebrating 20 Years of Excellence
This year also marked our 20th anniversary—a significant milestone that reflects two decades of innovation, growth, and unwavering commitment to excellence in hosting and data center solutions. Founded in 2004 in Cyprus, NetShop ISP has evolved from a local web hosting provider to a global leader with a presence in key markets worldwide. Read the Press Release
Looking Ahead
As we prepare for 2025, we remain steadfast in our mission to deliver exceptional hosting solutions, expand our global footprint, and drive innovation in the industry. We extend our heartfelt gratitude to our clients, partners, and team members for their continued support and collaboration!
NetShop ISP Leads Conversations on AI Trading at Cyprus Fintech Summit 2024
Event Highlights: NetShop ISP Empowering the Cyprus Fintech Summit 2024
NetShop ISP, a leading data center and hosting provider, proudly marked its successful participation at the Cyprus Fintech Summit 2024, further solidifying our position as a trusted partner to the global fintech community. As a long-standing partner of the Cyprus Fintech Summit and the official web hosting sponsor for the event, NetShop ISP highly contributed to the event’s success this year.
Held in the vibrant city of Limassol, the Cyprus Fintech Summit 2024 brought together industry leaders, innovators, and visionaries to discuss the evolving landscape of financial technology. The summit served as an essential platform for exchanging ideas, fostering partnerships, and exploring cutting-edge advancements in fintech.
Highlighting Our Role as the Official Web Hosting Sponsor
As the official web hosting sponsor, NetShop ISP ensured that the digital backbone of the event functioned seamlessly. From managing the summit’s official website to providing critical backend support, our hosting infrastructure played a key role in delivering a flawless experience for attendees, whether onsite or participating remotely.
“We are proud to have leveraged our reliable hosting solutions to uphold the summit’s reputation for excellence, enabling real-time updates, seamless registration processes, and an uninterrupted digital presence throughout the event“, said Stefano Sordini, CEO at NetShop ISP.
A Pioneering Discussion on AI Automation in Trading
One of the most anticipated sessions of this year’s summit was the panel discussion titled “The Future of Forex and Crypto Trading with AI Automation”, organized and moderated by our CEO, Stefano Sordini. The session brought together prominent figures from the forex, crypto, and AI sectors, sparking a dynamic conversation about how automation and artificial intelligence are transforming the trading landscape.
Connecting with the Fintech Ecosystem
Beyond the panel discussion, our team actively engaged with summit participants, exchanging ideas on how robust hosting solutions can empower fintech companies to achieve scalability, security, and superior performance. From startups exploring blockchain technology to established forex brokers requiring low-latency environments, our tailored hosting services were a focal point of many discussions at the event.
We extend our gratitude to the Cyprus Fintech Summit organizers, our partners, and all the attendees who made this event a memorable experience. We look forward to continuing our collaboration and to shaping the future of financial technology together.
Black Friday & Cyber Monday Offer – 30% Lifetime Discount on VPS Plans
Black Friday & Cyber Monday 2024 Offer – 30% LIFETIME DISCOUNT ON ALL VPS PLANS!
NetShop ISP, a leading global hosting provider, announces its Black Friday & Cyber Monday 2024 Hosting Deal. Customers can enjoy a 30% lifetime discount on all Virtual Private Server (VPS) plans, making it the perfect time to secure high-performance hosting solutions for businesses, developers, and traders.
With 20+ years of expertise, NetShop ISP is trusted by organizations worldwide for its reliable and scalable hosting services. Our VPS plans are designed to meet the unique needs of businesses in diverse industries such as Forex, iGaming, Martech, and more.
Don’t miss this chance to secure a powerful VPS Server at an unbeatable price!
Check out the easiest guide on how to install Sendy on Ubuntu 22.04 Server
Sendy is a self hosted email newsletter application that lets you send bulk emails without restrictions or high costs that come with other commercial, “as-a-Service” newsletter platforms.
Sendy is very cheap ($69 one-time fee) and you can install it on your own server which gives you great control given the fact that your database will contain sensitive data of third-parties.
Whilst there are many articles explaining how to install Sendy on AWS, there are very few guides on how to install Sendy on a self-hosted server; this is what we will demonstrate in this article.
Easy Steps to Install Sendy on Ubuntu Server
Pre-requisites
Valid Sendy license – during your license purchase you will be asked to submit your Name, Email and Domain name. These will be needed afterwards so make sure you remember them.
Sendy application files – these are delivered to you upon the successful purchase of Sendy license.
SSH access on Linux Ubuntu server with ‘root’ or a sudo privileged account.
Note: All commands in this tutorial assume you are accessing the server using the root account. In any other case, please prepend “sudo” to each of the commands listed below.
Step 1: Install LAMP (PHP, Apache, MySQL/MariaDB)
Sendy software requires the LAMP stack to be installed. Please use the following commands on your Ubuntu server to install Apache2, PHP and MariaDB server.
NOTE: RUNNING ALL PARTS OF THIS SCRIPT IS RECOMMENDED FOR ALL MariaDB SERVERS IN PRODUCTION USE! PLEASE READ EACH STEP CAREFULLY!
In order to log into MariaDB to secure it, we'll need the current password for the root user. If you've just installed MariaDB, and you haven't set the root password yet, the password will be blank, so you should just press enter here.
Enter current password for root (enter for none): OK, successfully used password, moving on...
Setting the root password ensures that nobody can log into the MariaDB root user without the proper authorisation.
Set root password? [Y/n] Y New password: Re-enter new password: Password updated successfully! Reloading privilege tables.. ... Success!
By default, a MariaDB installation has an anonymous user, allowing anyone to log into MariaDB without having to have a user account created for them. This is intended only for testing, and to make the installation go a bit smoother. You should remove them before moving into a production environment.
Remove anonymous users? [Y/n] Y ... Success!
Normally, root should only be allowed to connect from 'localhost'. This ensures that someone cannot guess at the root password from the network.
Disallow root login remotely? [Y/n] Y ... Success!
By default, MariaDB comes with a database named 'test' that anyone can access. This is also intended only for testing, and should be removed before moving into a production environment.
Remove test database and access to it? [Y/n] Y - Dropping test database... ... Success! - Removing privileges on test database... ... Success!
Reloading the privilege tables will ensure that all changes made so far will take effect immediately.
Reload privilege tables now? [Y/n] Y ... Success!
Cleaning up...
All done! If you've completed all of the above steps, your MariaDB installation should now be secure.
Thanks for using MariaDB!
Step 2: Create Database for Sendy
Connect to your mysql server using command line using the root password you set in the previous step.
root@localhost:~$ mysql -uroot -p

MariaDB [(none)]> create database sendydb;
Create a user and grant it with full permissions on the database:
MariaDB [(none)]> GRANT ALL ON sendydb.* TO 'sendy'@'localhost' IDENTIFIED BY 'enter-strong-password-here';
Step 3: Upload Sendy software
Upon successful license purchase, a zip file containing the application files should have been delivered to you. Upload the zip on the /var/www/html/ directory of your server and proceed with unzip, as follows:
A new folder ‘sendy’ will be created under /var/www/html. In order to avoid having the /sendy/ in your URL, you can move the contents outside the /sendy/ folder, as follows:
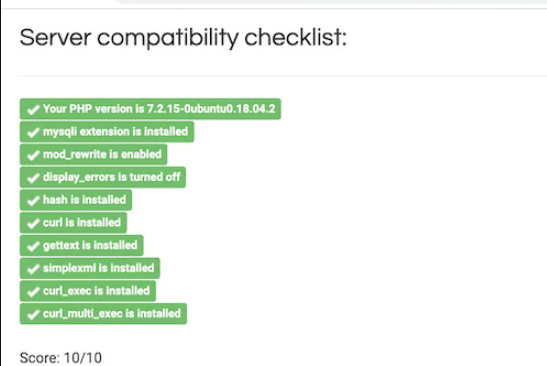
The last step of this tutorial is the easiest. Prior accessing the Sendy installation wizard, navigate to the following URL to confirm your server environment meets all requirements for Sendy:
https://<your_domain>/_compatibility.php?i=1
If everything has been installed as per this tutorial, you should see a 10/10 score which means you can proceed to installing Sendy.
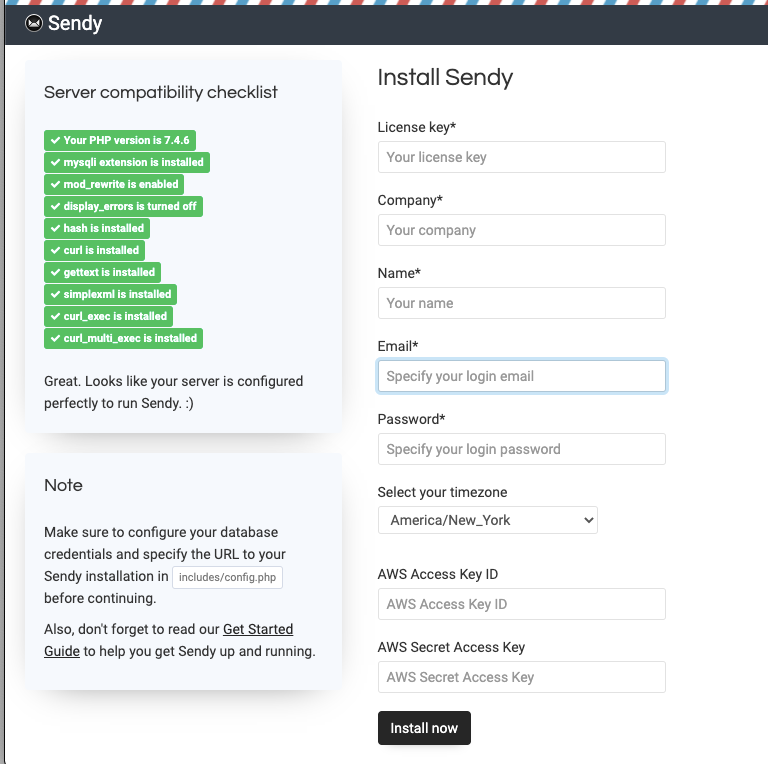
Navigate to the following URL so you can begin the Sendy installation:
https://<your_domain>/_install.php
Complete the required fields as indicated in the installation wizard and click “Install now“.
Congratulations! You have successfully installed Sendy on Ubuntu 22.04 server!
Need Help? Have Sendy Installed for Free!
By purchasing any VPS or dedicated server from NetShop ISP, we can install Sendy completely free of charge. All we will need is the license key and the zip file which you have obtained when purchasing the Sendy license.