Preparing for the Daylight Saving Time (DST) Change: Essential Updates for MetaTrader 4/5 Platforms
As Daylight Saving Time (DST) approaches, it’s important to understand how this change affects your MetaTrader 4 (MT4) and MetaTrader 5 (MT5) trading platforms and what steps are necessary to ensure smooth operations.
As Daylight Saving Time (DST) approaches, it’s important to understand how this change affects your MetaTrader 4 (MT4) and MetaTrader 5 (MT5) trading platforms and what steps are necessary to ensure smooth operations. This guide explains what’s changing, why it matters, and how to adjust your server timezone settings accordingly.
What Does the DST Change Mean?
In regions that observe DST, clocks will soon shift by one hour. For those using GMT+2 (Athens) time, this typically involves setting clocks back an hour in the fall and forward an hour in the spring. This adjustment helps keep local time aligned with daylight hours, but it also has significant impacts on time-sensitive systems, such as trading platforms.
Why is DST Important for MT4 and MT5 Trading Platforms?
MetaTrader 4 and MetaTrader 5 platforms are heavily time-dependent. The platform relies on accurate timestamps to handle trades, log history, and maintain alignment with market hours. Incorrect server times can result in:
- Order Execution Issues
Orders may execute at incorrect times if the server time isn’t aligned with the market, leading to potential losses or missed trading opportunities. - Inaccurate Trading Data
Trading charts, reports, and history logs may show inaccurate times, making it harder to analyze performance and market trends. - Data Consistency Across Servers
Any additional servers that send or receive data to/from MT4/MT5 must match the main server’s time settings to ensure smooth data flow and prevent errors.
How to Update Your Server Timezone Settings
Depending on the current timezone settings configured on your MT4/5 platform and the server itself, you may or may not need to do any changes. All forex brokers must get advise from their respective trading platform administrator whether any changes are required.
How to Update Timezone on Windows Server 2022
From the bottom right of your windows server screen, right-click on the server’s time so you get prompted with the popup menu as shown in the screenshot below.
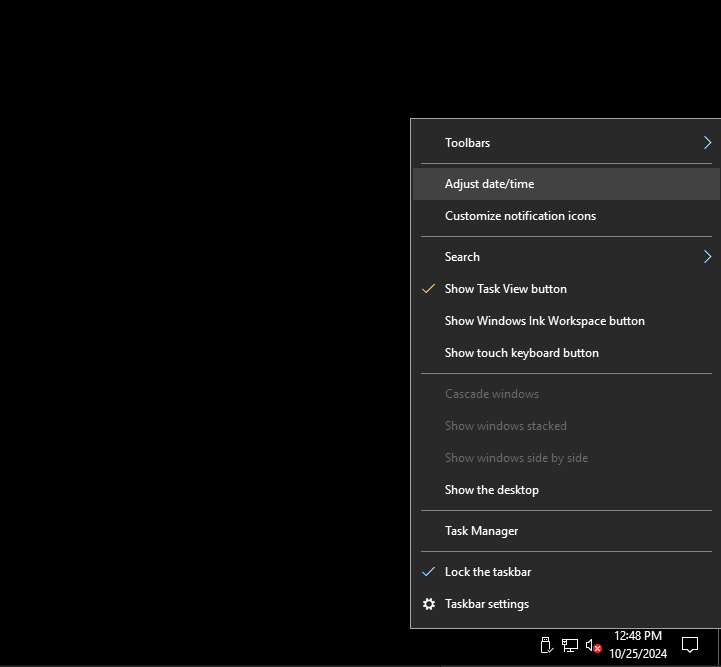
Then click Adjust date/time.
On the new window you will be presented with the current time zone settings. In our example, the server is currently configured with UTC+3 Moscow, St. Petersburg which is not impacted by DST changes.
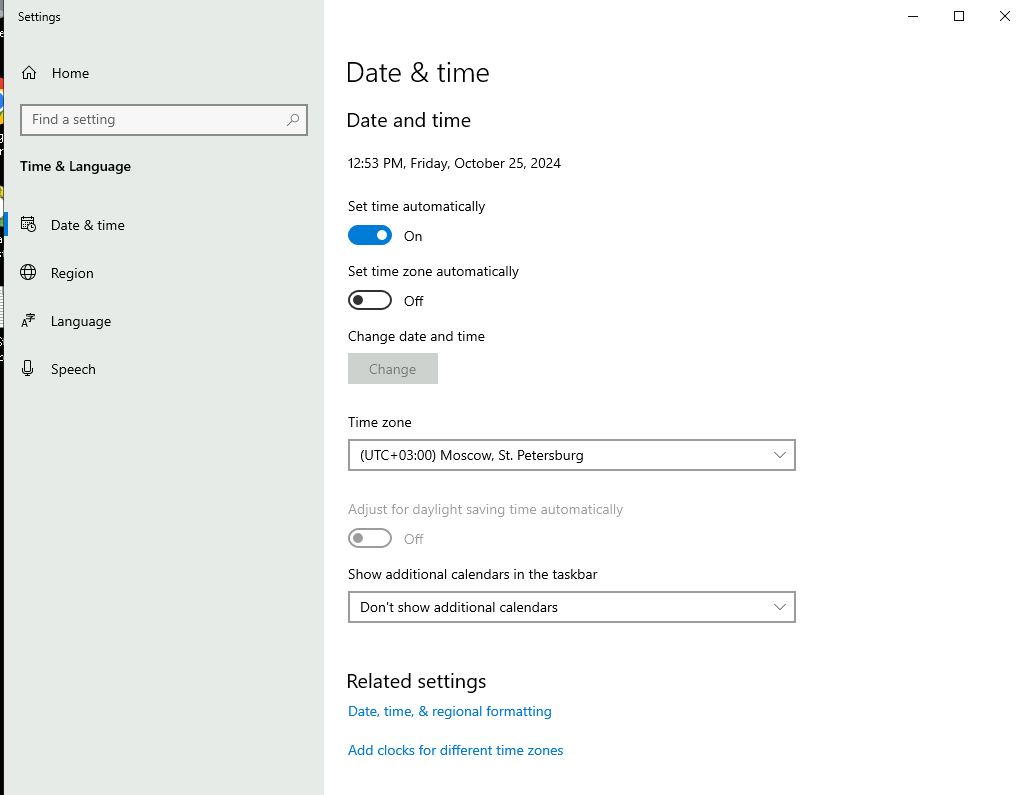
So in this case, we will change the time zone to: (UTC +02:00) Athens, Bucharest.
Ensure the option “Set time automatically” is On and then close the window.
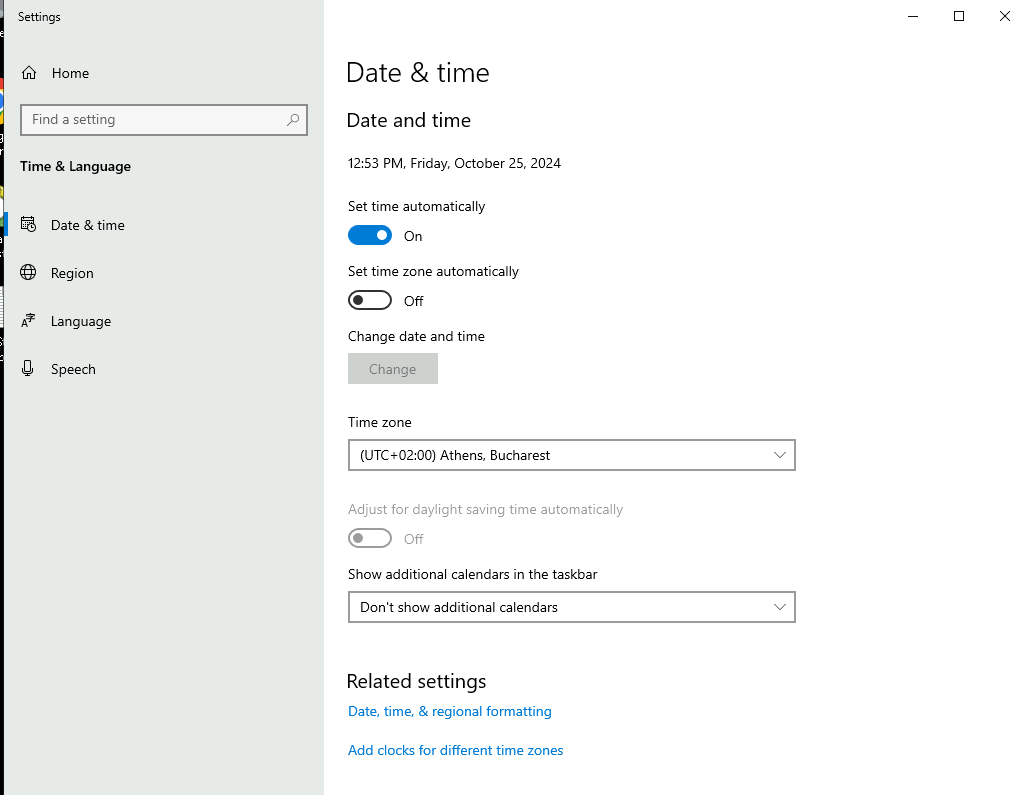
Make sure that the time on your server has changed to reflect the correct time with DST, from the bottom-right of your server’s window.
Final Reminder
Making these updates before the upcoming FX trading market opening will prevent unnecessary complications and ensure your trading platforms operate smoothly. If you need assistance or have any questions, don’t hesitate to reach out to our support team.
Customers subscribed to NetShop’s Premium SLA are entitled to a free hands-on assistance for this task.